Slow Cooker Pulled Pork

pulledporksandwich

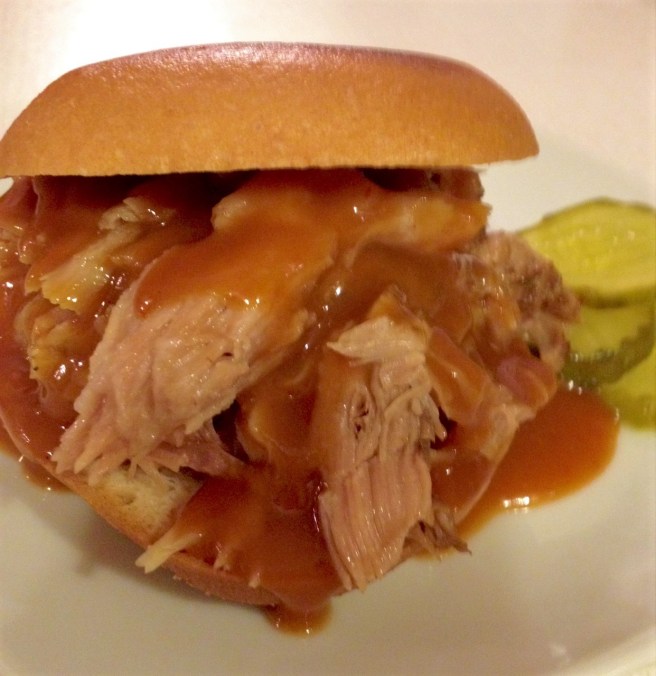
Pulled Pork Sandwich with Carolina Style BBQ Sauce

If you eat pork, then most likely you have had a “Pulled Pork” sandwich at some time or another.

The roots of Pulled Pork can be traced to the southeastern coastal states where indigenous peoples were slow smoking game over open fires to help preserve the meat. Early Spanish settlers adapted the method using cheap and easy to maintain pigs as the main protein source. As more people came into the areas they added their own cultural tastes with seasonings and condiments until each region had its own cooking style and sauce preference. Still one thing is common to all — the use of the low and slow cooking method.

Now that Pulled Pork is enjoyed all over the country, many home cooks have found that one sure fire method of achieving low and slow cooking is using their trusty ‘crock pot‘ or slow cooker. 

So why am I writing about slow cooker Pulled Pork… and does it have anything to do with Lista’s Italian Cuisine? Not much — but I recently chatted with a co-worker about her slow cooker Pulled Pork disaster and thought I could share some of my experience and methods and maybe help some of you have a successful Pulled Pork experience (after all it’s a popular food served during the football season).

But first let me reminisce. Not about Lista’s Restaurant, but about my very first experience eating Pulled Pork nearly 30 years ago. We were attending the Renaissance Faire in Sterling NY with some friends and while walking around, taking in all the sight and sounds, I first smelled — and then saw a vendor selling pork sandwiches and I decided I had to have one. The sandwich consisted of barbecued  Pulled Pork topped with pineapple coleslaw stuffed into a pita pocket. It had some clever (Faire appropriate) name which I can’t recall… but the taste was amazing and I still remember how tender and juicy the pork was and how the tangy sauce and crunchy coleslaw complimented it so well. And I couldn’t wait to figure out how to make it myself. And that’s when I started learning how to make delectable Pulled Pork and the various cooking methods out there.

Although I have tried different ways to make my Pulled Pork at home, by far my favorite and easiest method is to use my trusty slow cooker. For me, using the slow cooker is not only convenient it saves energy (some studies say half the cost of a conventional oven). And slow cookers are considered safe to leave unattended for long period (assuming there are no defects such as a damaged cord or heating element) and that allows me to use my time for other things… like writing this blog.

When making Pulled Pork you need the right cut of pork, and by far the most popular, economical, and flavorsome cut is the pork shoulder or “Boston butt” roast. The shoulder roast comes from the upper shoulder (the lower portion is called picnic) and is sold both bone-in and boneless (I prefer bone-in because it imparts more flavor) and is generally found to weigh from 5 to 12 lbs. The shoulder  has a combination of leaner “light” meat and fattier “dark meat” in the same roast. This combination provides the needed moisture to keep the meat tender during the long cooking process — and it gives the final dish a nice even texture and flavor. 

The pork shoulder roast will also have a “fat cap” or layer of white fat covering one side… and that’s a good thing since this fat is what keeps the Pulled Pork from drying out during the slow cooking. When you’re done cooking you can very easily remove the excess fat before shredding it for serving.

At our local grocery chain you can buy a very nice bone-in pork shoulder roast at an extremely reasonable price year round, however, the roasts are often too big for some families and they end up buying a smaller roast at a much higher price. Here’s a tip: buy the larger roast and take it to the meat counter and ask to have it cut in half, which they will gladly do at no extra charge. Now you have two smaller roasts at the lower price and you can cook one immediately and freeze the other for another time.

Now that you know what to buy, you need to know how to cook it. The recipe below is my go-to way of making tender, juicy Pulled Pork in a slow cooker. My slow cooker holds 7 quarts so it can accommodate a large roast.  I like to season my pulled pork very simply with kosher salt and freshly ground black pepper — but you can add a complex rub (homemade or store bought) and/or aromatics (garlic, onions, herbs, bay leaf, etc.) if you want. I do add some broth to the slow cooker and often 1-2 teaspoons of liquid smoke flavoring. You can add whatever liquid you prefer water, beer, cola, etc. and it will still cook the same — only the flavor profile will change.


Slow Cooker Puller Pork

Prep time:  10 minutes
Cook time:  6 hours 
Serves:  about 16 servings

Ingredients:
8 lbs Bone-in Pork Shoulder Roast
1 -2 TBSP Kosher Salt
1 TBSP Freshly Ground Black Pepper
2 cups Beef Broth
1-2 tsp Liquid Smoke Flavoring (optional)
Cooking Spray – as needed

Directions:
1. Remove roast from packaging, rinse and pat dry with paper towels.
2. Poke the roast all over with a carving fork or small sharp knife. Season generously on all sides with salt and pepper (or whatever seasoning you choose).
3. Spray crock of slow-cooker with cooking spray (or use a slow-cooker liner). Pour broth (or other liquid) into crock, add liquid smoke if using and stir. Place the seasoned roast fat side up in crock, cover and set to high. (Make sure the slow-cooker is plugged in!)
4. Cook on high for 3 hours and then cook on low for 3 more hours (if you want to cook while you’re at work, etc. cook on low the entire time). You might want to turn the roast over after 4-5 hours to ensure even cooking – but this is not necessary.
5. After 6 hours the roast should be fork tender and bone easily removed. If not continue to cook for 1-2 more hours.
6. Carefully remove whole roast and place fat side up on large platter or rimmed baking tray. Using tongs remove the bone and discard, remove as much of the excess fat as possible and discard. Using tongs or a couple of forks, gently “pull” the meat apart into shreds or small bite-size pieces. Add some of the cooking liquid if you want to have the Pulled Pork moister (especially if you are serving it without added sauce).
7. Serve as is, or on rolls — adding your favorite style BBQ sauce, gravy or condiments.


After I cooked my Pulled Pork I decided to use some of it to make a version of a “Cuban” sandwich similar to one served at a popular local BBQ joint. This is by no means an authentic Cubano but it came out pretty tasty and was a nice change from a typical Pulled Pork on a roll with sauce.

pulledporkcubano

Dan’s Pulled Pork “Cubano

Prep time: 10 minutes
Cook time: 10 minutes
Serves: 2

Ingredients:
1 cup Leftover Pulled Pork (with out sauce)
4 slices Deli Smoked Ham
4 slices Deli Swiss Cheese
1/4 cup Dill Pickle Slices
1-2 TBSP Softened Butter
2 Sandwich Rolls (split) or 4 slices Good Quality Bread (we used Gluten Free)
2 TBSP Mayo
1 TBSP Yellow Mustard
Pinch of Cayenne Pepper

Directions:
1. First, blend the mayo, mustard and cayenne in a small bowl. Spread this evenly over the cut sides of the rolls.
2.  Next layer the other ingredients on the two roll bottoms in this order: one slice Swiss cheese, 1/2 cup pulled pork, 2 slices ham, a few dill pickle slices, then another slice of Swiss cheese. Place the roll top over the filling and spread a little butter on the outside of the roll.
3. Heat a skillet over medium heat until hot. Place the two sandwiches side by side with the buttered top down on the hot pan. Spread a little butter on the bottom of the sandwiches and place a weight on them to press them down while they cook. [You can use a foil wrapped brick, another heavy skillet – like cast iron, or one of those sandwich presses that sometimes come with a grill pan.]
4. Grill the sandwiches until they are brown and crisp on the one side, then flip them over and press them down to grill the other side until it is crispy and the filling has warmed through.
5. Remove sandwiches from pan, cut at an angle and serve with some plantain chips.


So there you have it, a basic recipe for making delicious Pulled Pork in your slow cooker and a variation on a classic “Cuban” sandwich to help utilize some of the leftovers. If you’ve struggled making Pulled Pork or if you’ve never attempted it, I think this simple method will yield great results.

Until next time remember, “The Sauce Makes the Difference!”

Spinach & Feta Meatloaf

One of my best-loved weekend treats is to go out for breakfast to any of the numerous local diners. I am a big fan of breakfast food, especially omelettes, and no matter which local diner I choose I’m confident they will have my go-to favorite Greek omelette made with spinach and feta cheese. So recently after having breakfast with my wife and father-in-law, it was my favorite breakfast that inspired me to make this Spinach & Feta Meatloaf for dinner.

Although meatloaf is one of my favorite nostalgic foods, truthfully I don’t make it very often. Once in a while, when inspired to put together the classic ground-meat meal, I generally follow my Dad’s traditional recipe from Lista’s Italian Cuisine (see my post from October 6, 2017). This time, however, I wanted to try a stuffed meatloaf and so the Spinach & Feta idea came to mind.

This wasn’t the first time I’ve filled a meatloaf with veggies and cheese… actually a stuffed meatloaf was one of the very first recipes I made for my family when I was a kid. Most likely the recipe came from one of the PBS cooking shows I watched, or from a ladies magazine I browsed while waiting for my mom to have her hair done. Back then I made a meatloaf that was layered with cheddar cheese and chopped broccoli and baked in a ring mold. It was pretty unorthodox for our family to eat the broccoli and cheese inside the meatloaf… kind of “high class” eating such fancy meatloaf in the Lista house. But the recipe was a hit and I made it several time over the years.

Since then I’ve done some wonderful things with the humble meatloaf but I think this Spinach & Feta pinwheel will be a “crown jewel” in my meatloaf repertoire.

Using a basic meatloaf combination of ground beef, eggs, breadcrumbs and seasonings, I formed a large rectangle 15″ x 18″ on some parchment paper, topped it with frozen chopped spinach (thawed and squeezed dry), crumbled feta cheese, and sliced kalamata olives (just because we like them so much). Then I rolled it up jelly-roll style and baked it. After letting it rest for a few minutes out of the oven, it sliced beautifully, and tasted great! I used 90% lean ground chuck, but this could also be made with ground turkey or meatloaf mix (beef, veal, pork) or your preferred ground meat combo. I think next time I’m going to try a beef and lamb combination.

We love, love, love olives… but if you’re not particularly fond of olives, this would be equally delicious without them — instead try substituting diced roasted red peppers which would be perfect in this dish. Using fresh spinach instead of frozen would also be very nice (I just didn’t have any on hand that day). 

As an afterthought, I decided to make a horseradish, mayo and sour cream condiment to serve on the side which added a nice sharp, creamy addition to the Greek inspired flavors.


Spinach & Feta Meatloaf

Prep time:  20 minutes
Cook time:  45-60 minutes + resting time
Serves:  8-10 servings 

Ingredients:
2 lbs 90% lean Ground Beef (or alternate ground meat(s)
3 Eggs
3/4 cup Dry Bread Crumbs
1 TBSP Dry Parsley Flakes
1 tsp Dry Oregano
1 tsp Salt
1 tsp Freshly Ground Black Pepper
1 tsp Paprika
1/2 tsp Garlic Powder
16 oz package Frozen Chopped Spinach – thawed
8 oz Feta Cheese – crumbled
1/2 cup Kalamata Olives – sliced or chopped

Directions:
1. Preheat oven to 350 degrees F and coat a 9×13 inch baking dish with cooking spray.
2. In a large bowl combine ground beef, eggs, breadcrumbs, parsley, oregano, salt, pepper, paprika, and garlic powder — mix with clean hands (or disposable gloves) until fully combined.
3. Put thawed spinach in a colander or sieve and squeeze out the excess moisture.
4. Place a large sheet of parchment paper on work surface, pat out meatloaf mixture on the parchment into a roughly 15″ x 18″ rectangle – press down firmly to remove any air pockets to ensure meatloaf will hold while rolling. Evenly top the meat mixture with the chopped spinach, then sprinkle the chopped feta evenly over spinach, and finally sprinkle the sliced olives over the feta.
5. Starting a the narrow end, carefully roll meatloaf “jelly roll” style 
(use parchment to help lift and roll meatloaf as needed) into a tight cylinder – sealing ends [see photos 1 & 2 above].
6. Place meatloaf roll in the prepared baking dish and place in the center of preheated oven and bake for 45-60 minutes until fully cooked and a thermometer inserted in the center of meatloaf reads at least 165 F. Remove from oven and allow to ‘rest’ for about 15 minutes.
7. Using a serrated knife (like a bread knife) gently slice the meatloaf into 1″ slices and serve with your favorite side dishes (I served roasted Brussels sprouts and sweet potato fries). Serve horseradish sauce on the side if desired.


Quick Horseradish Sauce (5 minutes / yields 1 cup)

Ingredients: 1/2 cup mayonnaise, 1/2 cup sour cream, 2 TBSP prepared horseradish (or to taste), salt and pepper to taste (optional).
Directions: Whisk together ingredients in a small bowl, season with salt and pepper if desire. Chill for 30 minutes to blend flavors.


There you have it, Spinach & Feta Meatloaf inspired by my favorite diner breakfast. I hope you try this delicious Greek inspired recipe and add something new to your own meatloaf repertoire!

Until next time remember, “The Sauce Makes the Difference!”

Escarole & Beans

greensbeans

For what ever reason (tradition, habit, nostalgia) for as long as I remember there were seasons of foods in my family. Spring was a time for lighter fare reminiscent of the awakening world around us; Summer was grilling, picnic salads and simple, quick meals to sustain those on-the-go days — then as the colder weather of Fall set in we turned toward more satisfying, carb-filled “comfort foods” like hearty soups, pasta, and casseroles… eagerly followed by the festive fare that goes along with the Holidays… and so on into Winter with its rich roasts and stews. With all that in mind, I recently whipped up a batch of a classic Italian-American comfort food Escarole & Beans otherwise known as “greens and beans.” 

I’ve mentioned before, in our house growing up, “greens” usually meant escaroleOther greens like spinach, Swiss chard, mustard greens or beet greens were eaten occasionally as a side dish (and always sprinkled with vinegar) — my Grandma or Great-Aunt also cooked up dandelion greens and broccoli rabe from the back yard — but kale was not even on our radar. As a matter of fact, I’d never heard of kale until I was working in food service in the 80’s and kale was used exclusively as a decorative element lining salad bars and food trays (kale is such a hearty vegetable that we often re-used it over and over). And collard greens didn’t become part of my diet until the advent of the BBQ restaurant trend in the 90’s. Despite the limits to our greens repertoire… the Lista family enjoyed them fairly often.

Even my non-Italian maternal Grandfather, “Grampa Gailor” would cook up what he called “break greens” (I suspect they were fiddle head ferns) that he gathered up every spring “down by the creek” while fishing. He would bring home a big bunch of these ferns and cook them in his old cast iron skillet (which he never washed) with bacon grease (from the coffee can by the sink) and some “Eye-talian” seasoning. Talk about comfort food!

So getting back to Escarole & Beans… for me this is a perfect cold weather meal for a work day. It goes together quickly, can be easily adjusted for more people, can be as mild or spicy as you want, and gives you that comfort food unctuousness without having a lot of added fat. The beans and Romano cheese give this dish a creamy melt-in-your-mouth feel while the escarole provides substance and just a hint of bitterness in contrast.

Although I have traditionally made this with chicken broth, feel free to use readily available vegetable broth — leave out anchovy and cheese for the vegan folks. If you want to make this more of a soup, just add additional broth (about 2-3 cups).

If you’re looking for an added element to make this dish even more substantial — try adding some sliced cooked Italian sausage with the beans (one of my favorite ways to make it). To “fancy it up” for serving guests try toasting some coarse breadcrumbs in a skillet with a little olive oil, mix in some fresh chopped parsley and Romano cheese… put the finished Escarole & Beans in an oven proof serving dish and sprinkle the bread crumb mixture over the top — pop under the broiler for a minute or two and serve. 


Escarole & Beans

Prep time:  15 minutes
Cook time:  15 minutes
Serves:  4

Ingredients:
1/4 cup Olive Oil

3 cloves Garlic – chopped
3 Anchovy Fillets (optional)
1 pinch Crushed Red Pepper
1 large head Escarole – washed, trimmed, and cut into 1 inch pieces
3/4 cup Chicken or Vegetable Broth
1 (16 oz.) can Cannellini Beans – rinsed
Salt and Black Pepper – to taste
¼ cup grated Pecorino Romano Cheese (plus more for topping)
Crushed Red Pepper for topping (optional)

Directions:
1. Heat oil in a large deep skillet with lid over medium heat. Add the garlic and cook for about 30 seconds. Add the anchovies and red pepper and cook until the anchovies break down about 2-3 minutes.

2. Add in the broth and beans and bring to a simmer. Add the escarole to the pan and stir until the wilted about 2 minutes. Place the lid on the pot and cook for about 10 minutes or until some of the liquid is reduced. Turn off heat.
3. Uncover and stir in the Roman cheese, cover and allow to rest for about 2-3 minutes before serving.
4. Serve in shallow bowls, top Escarole & Beans with additional Romano cheese and a pinch of red pepper (if desired). Serve with good, crusty Italian bread or rolls for sopping up the sauce.


There you have it, Escarole & Beans, a quick and easy classic Italian-American comfort food dish to warm you up on a cold, rainy fall afternoon. I hope you cook and enjoy this version sometime soon.

Until next time remember, “The Sauce Makes the Difference!”