One Potato, Two Potato

As the weekend approaches with July 4th on the horizon, I have been thinking about summer picnics and, of course, Potato Salad!  

For me potato salad is not only iconic as an American picnic food — it is by far my favorite mayo-based side dish.

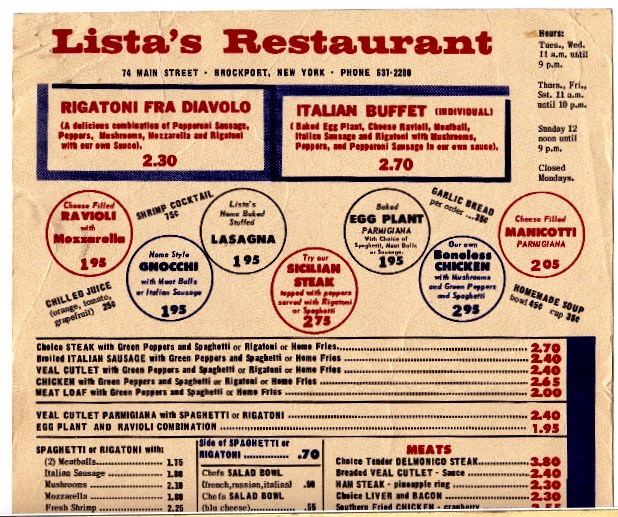
Now I know that everyone claims their family potato salad recipe is the best, but my Dad’s potato salad really was amazing.  What made it so “amazing?”  I think it comes down to a simple combination of quality ingredients, in the right proportion, with the right blend of flavor, color and texture.

When it came to cooking, Dad tended to lean toward the uncomplicated.  Most the recipes and techniques I learned from him were simple, tried and true, versions of the dishes many people over think or over embellish.  Take potato salad for example, Dad allowed the potatoes to be the star by only adding hints of other vegetables and not a lot of spices or other flavors.

So, let’s talk a little about ingredients:  

First, you need good potatoes. Most salad recipes will call for a thin skinned, waxy potato such as New Potatoes, Red Bliss or Yellow Finn. However, Dad used the starchy, thick skinned Russet potatoes at Lista’s. (Primarily because that’s what was on hand since we had cases of them for baked potatoes.) At home we most likely used all purpose potatoes like Yukon Gold. While it’s true that waxy potatoes hold their shape better when cutting and boiling — the secret to great potato salad is to cook the potatoes whole with the skin on. And choose potatoes that are all about the same size so they cook evenly. Cook the potatoes in salted water until just tender – make sure they are tender since crunchy potatoes are a big no-no in potato salad.  Make sure you allow the potatoes to cool thoroughly before mixing the salad to avoid breaking down the mayo.

Second, you need real mayonnaise (think Hellman’s).  Years ago mayo was much better than today.  It was heavier (thicker or more viscous) and contained fewer ingredients (oil, eggs, vinegar, lemon, salt, spices) which gave it a cleaner flavor. While you may choose to use fat free or light mayo for other purposes, stick with the real deal for this salad. (If you must make your own mayo for health reasons try to use a neutral flavor oil rather than olive, coconut or avocado for this recipe.)

Finally, you want fresh, mildly flavored vegetables to enhance the taste of the potatoes. Celery should be fresh, crisp and preferably taken from the more tender stalks between the outer stalks and the heart.  Onions should be a sweet summer variety like Vidalia. (Note: Onions should be cut with a very sharp knife to avoid releasing the more pungent flavor that comes from the cells being crushed by a dull blade.)  You’ll want a nice medium sized carrot that doesn’t have a woody inner core.  And although we used dry parsley flakes at the restaurant — you will want to use some well washed fresh flat leaf parsley.  Okay, now for the recipe.

Vinnie Lista’s Amazing Potato Salad

Prep time: 30 minutes
Cook time: 30-45 minutes
Yield: 8-12 servings

Ingredients:
5 lbs  Whole Russet Potatoes – well scrubbed and rinsed
5 large Eggs – hard boiled & chopped
2 1/2 cups  Good Quality Mayonnaise (such as Hellman’s)
1 cup  Finely chopped Celery (about 3-4 stalks)
1/2 cup  Finely chopped Vidalia Onion
1 medium Carrot – shredded with a box grater
2 TBSP  Fresh Flat Leaf Parsley – chopped
1 tsp Salt (or to taste)
1/2 tsp Ground Black Pepper
Ground Paprika – for garnish

Directions:
1.  In a large pot add potatoes and cold water to cover – add 2 TBSP salt.  Bring to a full boil, turn heat to med-low and simmer until just tender but not mushy — a paring knife should pierce the center easily (about 20-40 minutes).  Be sure to test the potatoes a few times toward the end so they don’t overcook.  Carefully drain potatoes and place on a tray to cool completely.  When cool, scrape off the skins with a knife (you should remove very little flesh) — remove any “eyes” or dark spots.  Cut the potatoes into 1″ chunks and place in a large mixing bowl.
2.  Place the eggs in a small pan with a lid, cover with cold water, add 1 tsp salt, and bring to a full boil over high heat.  Once boiling turn off heat, cover pan and set a timer for 12 minutes.  After 12 minutes, drain the eggs and rinse with cold water until cool enough to handle.  Peel and chop eggs — add to potatoes.
3.  Chop celery, onions, and parsley; and shred the carrot on the large holes of a box grater — add all vegetables to potatoes.
4.  Sprinkle with the salt and pepper and gently toss together to combine.
5.  Add the mayonnaise all at once and fold into the potato mixture until completely coated (add a bit more mayo if needed).  Taste and adjust salt if needed.
6.  Transfer the finished salad to a serving bowl and garnish with paprika.  Refrigerate until ready to serve.

And there you have it… Vinnie Lista’s Amazing Potato Salad.  I really hope you like this potato salad as much as I do and I hope you make it for your next picnic or summer get together.


I titled this post “One Potato, Two Potato” because I also want to share a new favorite potato salad that I created for a catering job recently.  I needed a menu that was vegan, gluten and dairy free — so I decided to make a Roasted Potato & Grilled Vegetable Salad dressed with a simple olive oil vinaigrette.  Give this one a try next time you are using your gas grill.

Roasted Potato & Grilled Vegetable Salad

Prep time: 30 minutes
Cook time: 30 minutes
Yield: 6-8 servings

Ingredients:
2 lbs  Tiny Whole Potatoes (white, yellow or red)
1 lb  Fresh Asparagus (try to get the thicker stalks) — trimmed of woody ends
2 large  Red Bell Peppers — seeded and cut into thirds
2 large  Vidalia Onions — peeled, ends trimmed flat, cut in half cross ways
2 TBSP  Flat Leaf Parsley — Chopped
1/2 cup Extra Virgin Olive Oil — plus more for preparations
2 TBSP Raw Apple Cider Vinegar (like Bragg’s)
1 TBSP Mild Dijon Mustard
1 TBSP  Wildflower Honey
1 tsp Sea Salt
1/2 tsp  Fresh Ground Black Pepper

Directions:
1.  Preheat oven to 400 degrees F
2.  Place well washed and dried tiny potatoes in a large bowl and toss with a little olive oil and sea salt.  Put on a foil lined rimmed baking sheet and place in preheated oven.  Roast until lightly browned, starting to wrinkle, and fork tender — about 20 minutes.  Remove from oven and allow to cool to room temperature.
3.  Preheat gas grill on high heat — clean and oil grate
4. Grill prepared vegetables over high heat until charred in spots and beginning to soften.  Remove to a platter to cool.
6. In a large mixing bowl whisk together the olive oil, cider vinegar, Dijon mustard, honey, salt and pepper.  Add in room temperature potatoes and parsley and toss together.
7.  Cut the cooled asparagus into thirds cross ways, cut peppers and onions into 1″ pieces and add all to the potatoes.  Toss together until thoroughly combined and coated with the vinaigrette.  Taste and adjust seasoning as need.
8. Pour potato salad into a serving dish and serve at room temperature (or chill in refrigerator before serving).


There you have it.  Two Potato Salad recipes that will work great with your picnic menu.

Thanks for reading my blog and if you enjoy what you see here please “Like” it, “Follow” it, or leave a Comment. Feel free to share the link with your family and friends — or on your social media platform.  http://74mainst.com

Have a great weekend and Fourth of July… and remember, “The sauce makes the difference!”


Annual Rig Fra Day – continued

Thanks everyone who read the post and made some Rig Fra this week.  Hope you enjoyed it as much as my family did this past Friday night.

I just had to share this great picture of an old Lista’s menu my Aunt Phyllis sent me (not sure the exact date but by the pricing I would say late 60’s / early 70’s — wish we could find a place that inexpensive today!)  

Notice that Rigatoni Fra Diavolo is featured right on top!

FullSizeRender

So until next time remember, “The sauce make the difference!”

Annual Rig Fra Day

June 23rd is Annual Rig Fra Day in the Lista family.  We started this tradition four years ago on the anniversary of Dad’s passing.  Gathering the family together, sharing memories, and eating Rig Fra (one of his signature creations) is our way of celebrating Dad’s life and his influence on our lives.

So what exactly is Rig Fra?  Rigatoni fra Diavolo is really the one dish that Dad became known for.  Rig Fra is a tasty combination of rigatoni, sauce, peppers, onions, pepperoni, and lots of melted cheese.  Although I’m not really sure when this concoction made it’s way onto the restaurant’s menu — I do remember it was a popular entree on its own, and it was also featured on the “Individual Italian Buffet Platter” — and it was a staple item at Dad’s catered events.

While, in the restaurant, Rig Fra was always made fresh to order on the stove top.  After Lista’s closed in 1980, whenever Dad was invited to a picnic or family gathering, he was asked to bring the Rig Fra.  On those occasions Dad would make it in a huge ‘steam table pan’ and bake it in the oven like lasagna.

Some of you may remember Dad’s famous dish from the Lista’s menu, and some of you from a picnic or family gathering… but unfortunately, some never had the pleasure of eating the one and only Lista’s Rigatoni fra Diavolo.

So, whether you choose to make Rig Fra on June 23rd or on any other day of the year I hope you do make it — and I hope you also remember the dish’s originator, Vinnie Lista.


A few words about Rigatoni… when buying rigatoni for this recipe I really suggest you look for the full size rigatoni with ridges (“…the big stove pipe kind” as one Lista’s customer used to say.)  When cooked they should collapse and no longer be tubes but more like double walled squares of pasta. And please don’t substitute ziti or penne or some other pasta — this dish was made for rigatoni. 

Now a few more words about grated cheese… Lista’s always served fresh grated Pecorino Romano cheese, never Parmigiano Reggiano (which seems to be the popular cheese today).  I’m not sure why, but I suspect it has something to do with our ancestry… or maybe we just liked the sharper, more piquant flavor.  Whatever the reason, I strongly urge you to splurge on good Pecorino Romano for any of the Lista’s recipes you try. 

Rigatoni fra Diavolo (Lista’s style)

Prep Time: 10-20 minutes
Cook Time: 30-45 minutes
Yield:  6-8 servings

Ingredients:
16 oz.  Dry Rigatoni Pasta (preferably the big ones) – cooked per package directions
1-2 TBSP  Olive Oil
8 oz.  White Mushrooms – cleaned & sliced
1 large  Green Bell Pepper – cleaned, seeded & cut into strips

1 large  Red Bell Pepper – cleaned, seeded & cut into strips
1/2 medium Yellow Onion – cut into 1/4″ slices

1/2 tsp.  Seasoned Salt
6 cups Prepared Spaghetti Sauce (2 – 26 oz. Jars if not using homemade)
6 oz.  Sliced Pepperoni 

1/4 tsp.  Crushed Red Pepper flakes (optional – more if you like more heat)
8 oz.  Block Mozzarella Cheese – cut into 1/2″ cubes
1/2 cup  Grated Pecorino Romano Cheese (not Parmesan) – plus more for topping

Directions:
There are several steps to this preparation and you have to be good at multitasking if you want to serve this dish directly from the stove top (restaurant style).  

Or you can prepare each component in advance; assemble everything cold in a large casserole dish, and bake in the oven until piping hot and lightly browned (picnic style).

To Prepare:
1.  In a large pot of salted water, cook the rigatoni per package directions to al dente.  Drain pasta into a colander and allow it to sit – keeping the pot empty for later use.
2.  In a medium sauce pan – heat sauce over medium heat until hot.  Add in the sliced pepperoni and crushed red pepper (if desired) – stir to distribute through the sauce.  Turn down burner to low, cover and keep warm.
3.  In a saute pan or skillet – heat 1 TBSP oil over medium high heat and saute
mushrooms until they have browned slightly.  Remove to a plate.  In the same pan add other 1 TBSP of oil and cook onions and pepper strips until just tender (about 5 minutes).  Add sliced mushrooms back to pan, sprinkle with seasoned salt and keep warm.
4.  Dice the mozzarella cheese into 1/2″ cubes and set aside.

To Assemble:
1.  In the large pot you kept handy, combine the hot sauce & pepperoni, cooked peppers, onions & mushrooms, cubed mozzarella and the Romano cheese.  Place on a burner set to med-low heat and stir until mozzarella begins to melt.
2.  Add in the cooked rigatoni and gently fold it into the sauce until fully incorporated and everything is saucy, cheesy, deliciousness.
3.  Serve Rigatoni fra Diavolo piping hot on individual plates topped with more Romano cheese.
4.  Alternately, to serve as a casserole:  In a large bowl mix the pasta, sauce, pepperoni, cooked vegetables, and cheeses – fold everything together until completely combined.  Pour into a 9″x13″ casserole that has been sprayed with cooking spray.  Bake in a preheated 350 degree F oven for about 45 minutes until heated through and cheese is melted.  Perfect for a picnic, “potluck,” or large family dinner.  

So until next time remember, “The sauce make the difference!”

Happy Father’s Day!

dad
Dad at Lista’s in the 70’s

To honor my Dad, Vinnie Lista, on Father’s Day I wanted to share about one of his favorite meals:

Friday nights were the busiest nights at Lista’s since it was “Fish Fry” night.  Haddock fish fries were (and still are) one of the most popular menu items in our area.  In case you’re unfamiliar, a fish fry is typically a large fillet of Haddock, dipped in batter (or breaded) and deep fried, served with french fries, coleslaw, and tartar sauce.  At Lista’s you could also choose to have your haddock served with a side of spaghetti or rigatoni.

dad2
Dad catering in the 90’s

Since our family observed the Roman Catholic tradition of not eating meat on Fridays, we often had Friday dinner with Dad at the restaurant.  Some of us ate fish fry; some ate pasta, but Dad almost always ate a dish he created for himself, broiled haddock with lemon-butter sauce served over a bed of spaghetti.  “Delicioso!” as he would say.  We eventually put the dish on the Lista’s menu and called it Haddock ala Vincenzo.  Not as popular as a fish fry… but still it did assume a certain following over time.

Haddock ala Vincenzo

Prep Time: 10 minutes
Cook Time: 20 minutes
Yield:  4 servings

Ingredients:
Cooking spray (such as Pam)
2 lbs Fresh Haddock Fillets (skinless if available) in four portions
1 tsp Lista’s Seasoned Salt
1-2 TBSP lemon juice (bottled or fresh)
2 TBSP Butter – cut into small pieces
8 oz Dry Spaghetti – cooked per package directions to al dente
6 TBSP Butter – melted
1 TBSP Chopped Parsley
1/4 cup Grated Pecorino Romano Cheese
Additional Lemon wedges for serving

Directions:
1.  Set oven rack about 6 inches from heat source and preheat oven’s broiler.  Line a rimmed baking sheet with foil and spray with cooking spray.
2.  Arrange haddock fillets on prepared baking sheet, sprinkle evenly with the seasoned salt and lemon juice, and dot with pieces of butter.
3.  Place prepared fish under preheated broiler and cook until fish is easily flaked with a fork, 6 to 8 minutes.
4.  In small saucepan melt remaining 6 TBSP butter and keep warm.
5.  Remove cooked fish from oven and pour any accumulated liquids into pan with melted butter, add chopped parsley and stir.
6.  Meanwhile bring a large pot of salted water to a boil and cook spaghetti per package directions. Drain cooked pasta into a colander over sink – shaking off excess water.  Divide hot pasta equally between 4 serving plates.
7.  Place broiled haddock on each portion of pasta, pour some of the parsley butter sauce over each portion and top with grated Pecorino Romano.  Serve with lemon wedges.  Delicioso!

NOTE:  If you cook dairy free you can easily substitute olive oil for the butter and leave off the Romano cheese .  If using Gluten Free spaghetti my experience has been that GF pasta made with a blend of brown rice, quinoa, and corn flours is the best choice.  

So until next time remember, “The sauce make the difference!”

Practice Makes Perfect

At Lista’s Italian Cuisine there were some menu items that only family were allowed to prepare. Sauce was one.  Meatballs were another.  One of the first things I learned at Lista’s was how to hand roll meatballs.

At a time when many people defined Italian food by Spaghetti & Meatballs, there was a constant demand at the restaurant.  So since demand requires supply… we rolled lots and lots of meatballs. 

Our recipe called for 15 pounds of ground beef, eggs, bread crumbs, etc. kneaded together in a huge galvanized metal tub and hand rolled to very exacting specifications.  If done right, the meatballs would completely fill a standard 18” x 26” sheet pan. The meatballs were arranged 10 across and 15 down.  150 evenly formed meatballs.  Since we didn’t use a scoop or other measuring device to portion out the meatball mix, we had to learn to do it all by sight and touch. It took me months of practice before I could actually get the “feel” to create the exact size and shape of each meatball.

Dad, on the other hand, was a meatball master!  He could roll perfect meatballs every time.  Almost every time anyone other than Dad rolled meatballs, he would walk by, scan the tray, and spy out the one meatball that was slightly bigger than the others… he would deftly snatch it out of position, pinch off a bit of meat, re-roll it to an almost perfect sphere, and drop it back into place as he passed on by.

[The restaurant version of this recipe used standard 80/20 ground beef.  If you prefer you can substitute a leaner 90/10 ground beef, ground round, or ground chuck – or you can use a “meatball mix” combination of Beef, Pork, and Veal.  I have found that the finer texture of ground turkey or chicken do not work as well with this recipe since the meatballs don’t roll as well.]

To make the Lista’s Seasoned Salt in this recipe:

Combine 6 TBSP Table Salt, 1TBSP Ground Black Pepper, 1 TBSP Granulated Garlic, 1 TBSP Ground Paprika, in a small bowl. Store tightly covered in a dry place. (This is a basic seasoned salt that also works well on grilled or roasted meats.)

Spaghetti & Meatballs

Prep Time: 20-30 minutes
Cook Time: 30 minutes
Yield:  Approx. 18 (1½ oz.) meatballs (enough for 4-6 servings)
Preheat oven to 350

Ingredients:
1 ½ lbs. Ground Beef
2 Large Eggs
½ cup Dry Italian Seasoned Bread Crumbs
½ cup Plain Quick Cooking Oatmeal (think Quaker Oats)
1 TBL  Dehydrated Minced Onion (or equivalent fresh minced onion)
1 TBL  Dry Parsley Flakes
¼ cup Grated Pecorino Romano Cheese (plus more for garnishing)
1 tsp Lista’s Seasoned Salt (see recipe above)
8 oz. Dry Spaghetti cooked per package directions for “al dente” pasta
6 cups Prepared Lista’s Spaghetti Sauce – heated

Directions:

  1. Preheat oven to 350 degrees F.
  2. Line a rimmed baking pan or cookie sheet with foil or parchment and spray with non-stick cooking spray (like Pam)
  3. Combine all the ingredients in a large bowl and knead it together by hand until completely incorporated … and then knead some more to be sure its mixed very well.
  4. Working with moistened hands, take about 3 tablespoons of the meat mixture and roll in your palms to form a tight meatball. Continue until all the meat mixture is used up.
  5. Starting at one corner of the baking pan, line the meatballs up across one short end and make rows so all the meatballs are touching each other – but not packed tight.
  6. Place in the middle of the oven and bake uncovered for approximately 30 minutes until browned and have reached an internal temperature of 165F.
  7. While the meat balls are baking, Heat the sauce on the stove top over med-low heat stirring frequently until warmed through and steaming. Prepare the spaghetti per package directions for “al dente” pasta. Drain and return to cooking pot with a few ladles of sauce and toss to coat.
  8. Serve the spaghetti on rimmed plates with 3 meatballs, topped with additional sauce and a generous sprinkling of Grated Pecorino Romano Cheese.

More Meatballs…

Like my wife, Andrea, many of you have a food intolerance, allergies, dietary restrictions, or health choices that require you to avoid certain ingredients.  I have adapted the above meatball recipe to meet for my family’s needs and I hope it also works for yours.


Gluten & Dairy Free Meatballs

Ingredients:
1 lb. Ground Beef or Turkey
½ lb. Mild Italian Sausage (about 2 links – casing removed) – or use all beef or turkey
2 Large Eggs
½ cup Cooked & Cooled Organic Quinoa
½ cup Gluten Free Oatmeal (such as Bob’s Red Mill)
2 TBL  Finely Minced Sweet Onion
1 TBL  Dry Parsley Flakes
½ tsp Dry Italian Seasoning
¼ tsp Granulated Garlic
Salt & Freshly Ground Pepper to taste

Directions:

  1. Preheat oven to 350 degrees F.
  2. Line a rimmed baking pan with foil or parchment and spray with non-stick cooking spray (like Pam).
    NOTE: You can also cook these in a standard or mini muffin pan – this works well when using ground turkey as they can be harder to roll and keep in a ball shape.
  1. Combine all the ingredients in a large bowl and knead it together by hand until completely incorporated.
  2. Working with moistened hands, take about 3 tablespoons of the meat mixture and roll in your palms to form a tight meatball. Continue until all the meat mixture is used up.
  3. Starting at one corner of the baking pan, line the meatballs up across one short end and make rows so all the meatballs are touching each other – but not packed tight.
  4. Place in the middle of the oven and bake uncovered for approximately 30 minutes until lightly browned and have reached an internal temperature of 165F.

Let us know how your meatballs turn out!  And as always we love to hear your comments, questions, or memories of Lista’s Italian Cuisine. 

So until next time remember, “The sauce make the difference!”

The Sauce Makes the Difference!

At Lista’s we only served one sauce.  We usually called it spaghetti sauce – or most the time just sauce. We never said “pasta sauce” (for that matter we never said “pasta” it was macaroni or spaghetti).  Our menu had no marinara, no pomodoro, no aglio e olio, no pesto, no carbonara, no amatriciana, no aribiata, just plain old spaghetti sauce.

The sauce was developed first by my Grandfather “Pat” Lista and perfected by my Dad, Vinnie.  It was a smooth, savory, medium thick tomato sauce, not sweet and not acidic with hints of onion, garlic, basil, oregano… and fennel seed (one of the family secrets).

The tag line at Lista’s declared, “The Sauce Makes the Difference” …and it did!

[Note: As will be for many of the recipes on this site, the ingredients are based on what was used at Lista’s in the 50s, 60s and 70s.  Things were simpler then and ingredients were basic – like dried herbs instead of fresh.  You can definitely use fresh herbs and garlic if you prefer.  Also, tomato products have changed over time and what I remember as crushed tomatoes was a thick consistent product that had no chunks or diced tomatoes in it so the finished sauce was very smooth.  I suggest buying a high quality brand of tomatoes for this recipe.]

Lista’s Spaghetti Sauce

Prep Time: 15 minutes
Cook Time: 1 hour 15 minutes
Yield: Approx. 1 gallon

Ingredients:
2  28 oz. Cans Crushed Tomatoes
1  18 oz. Can Tomato Paste
7 cups Water
1 cup Diced Yellow Onion
½ cup Olive Oil
1 TBSP Granulated Garlic
1 TBSP Dry Sweet Basil
1 TBSP Table Salt
½ TBSP Fennel Seed
1 tsp Dry Whole Leaf Oregano
½ cup Italian Seasoned Bread Crumbs (optional)

Directions:
1.  In a large non-reactive sauce pot add the oil and diced onions and cook over medium heat until just translucent.
2.  Add the tomatoes, tomato paste, and water (using the water to rinse the cans). Whisk together until completely combined.
3.  Add the garlic, basil, fennel, salt, and oregano.  Stir to blend.
4.  Bring sauce to a simmer over medium heat, stirring frequently and then turn down burner to low and cook, uncovered, over low heat, stirring occasionally, for about 1 hour.
5.  Whisk in the bread crumbs and turn off burner.  Cover pot and allow to rest at least 15 minutes before serving.
6.  If storing for later use, pour cooled sauce into a covered container and store refrigerated for up to 1 week, or in the freezer for up to 3 months.
7.  Depending on your use and the size of your pot – you can double or triple this recipe as is and store the finished sauce in the refrigerator, freezer, or in jars following an approved home canning method.

Always remember, “The sauce make the difference!”